This is an old revision of the document!
Table of Contents
Contiki OS and Sparrow
UDP
We will want to be sure that two nodes can exchange real application data between them. We can do so with the UDP client/server test. Again, this requires two nodes. One node contains the server program, the other contains the client. When making the client, we need to tell it where to find the server by specifying NODE= the Node# of the server.
$ cd tests/udp-ipv6
$ make NODE=3 -j10
$ make udp-client.avr-zigduino.u AVRDUDE_PORT=/dev/ttyUSB1 NODE=3
$ make udp-server.avr-zigduino.u login AVRDUDE_PORT=/dev/ttyUSB0
Working correctly, you'll see something like the following. The exact numbers will depend on the timing of when you do the 'make login'.
connecting to /dev/ttyUSB0 (57600) [OK]
Power-on reset. External reset!
*******Booting Contiki 2.5*******
MAC address 2:11:22:ff:fe:33:44:3 nullmac sicslowmac, channel 26
IP addresses [4] fdfd::3 fe80::11:22ff:fe33:4403
UDP server started Server IPv6 addresses: fdfd::3 fe80::11:22ff:fe33:4403
+READY Server received: 'Hello 2 from the client' from fdfd::1
Responding with message: Hello from the server! (1) Server received: 'Hello 3 from the client' from fdfd::1
Responding with message: Hello from the server! (2) Server received: 'Hello 4 from the client' from fdfd::1
Responding with message: Hello from the server! (3) Server received: 'Hello 5 from the client' from fdfd::1
Responding with message: Hello from the server! (4) Server received: 'Hello 6 from the client' from fdfd::1
Responding with message: Hello from the server! (5) Server received: 'Hello 7 from the client' from fdfd::1
+OK PASS
Shell
The shell is a very powerful feature of Contiki. Within this OS lies a fully-featured command shell. The shell in the avr-zigduino platform is a subset of the full Contiki shell, including only the shell modules which have been proven to work on this platform.
Building
$ cd tests/shell
$ make upload
$ make login
Running
If successful, you'll see this:
connecting to /dev/ttyUSB1 (57600) [OK]
Power-on reset. External reset!
*******Booting Contiki 2.5*******
MAC address 2:11:22:ff:fe:33:44:1 nullmac sicslowmac, channel 26
Contiki command shell Type '?' and return for help
68.1: Contiki>
IP addresses [4] fdfd::1 fe80::11:22ff:fe33:4401
help
Now, try some of the commands, like 'help':
Available commands:
?: shows this help
binprint: print binary data in decimal format
blink [num]: blink LEDs ([num] times)
echo <text>: print <text>
exit: exit shell
hd: print binary data in hexadecimal format
help: shows this help
kill <command>: stop a specific command
killall: stop all running commands
netstat: show UDP and TCP connections
null: discard input
ping <host>: ping an IP host
ps: list all running processes
quit: exit shell
randwait <maxtime> <command>: wait for a random time before running a command
repeat <num> <time> <command>: run a command every <time> seconds
size: print the size of the input
time [seconds]: output time in binary format, or set time in seconds since 1970
timestamp: prepend a timestamp to data
68.1: Contiki>
blink & kill
Try “blink 100 &” to start blinking the LED's for 100 times. Notice the '&' at the end of that! You should now see all 3 LED's on Zigduino flash on and off repeatedly.
Then type “kill blink” when you're done admiring your blinking lights.
ping
We can also ping from within the shell!
68.1: Contiki> ping fdfd::3
SEND 13 bytes ping fdfd::3
Sending Echo Request to fdfd:0000:0000:0000:0000:0000:0000:0003 from fdfd:0000:0000:0000:0000:0000:0000:0001
Other ICMP6 message received.
Echo reply received.
Sensors
The most common thing to do with a sensor network is collect data, so that's just what we'll do. Contiki includes a rich toolset for collecting and viewing sensor data. This section will take a close look at each piece.
Overview
Contiki's sensor collection and display system, collect-view, has five major components:
Sensors Message-builder Sender nodes Sink nodes Collect-view Java app Individual Sensors
Contiki defines macros to provide a standard interface to sensors. Each sensor gets its own module under platform/avr-zigduino/dev e.g. temperature-sensor.c. This module is responsible for interfacing with the hardware to collect the actual sensor value. Each sensor module produces one value each time it's requested.
Message Builder
The message builder collects sensor readings from all known sensors into a sensor message. This work is done by the node-side 'app' in “apps/collect-view”. Obviously the message built here needs to correspond to the message expected in the java app.
Sender Nodes
The sender code in examples/ipv6/rpl-collect/udp-sender.c is responsible for putting a sender node on the network, and packaging a message and putting it on the wireless network. It also adds some additional information about the sender node itself. Each of potentially very many sender nodes runs this firmware.
Sink Node
The single sink node listens to all the senders in the system, receives their messages, adds some information about the sender's network connection, and puts the results on the serial line.
Java collect-view
The java collect-view app listens to the sink on the serial line, and displays the results for our enjoyment. Each message from the sender is relayed out on the serial line for the java app to pick up and add to its graph.
Node Images: rpl-collect
Build the rpl-collect example. This brings together all the client-side components, and creates two firmware images. One for the senders, and one for the sink. Note that the avr-zidguino platform now uses RPL by default, so this image will automatically and invisibly create a mesh-tree network to find the optimum path for each sensor message back to the sink.
Building
The 'PERIOD' below is the maximum number of seconds between transmissions from each node. For testing, it's useful to have a small number like 15. For production use, you'd want something much higher like 120.
$ cd examples/ipv6/rpl-collect
$ make TARGET=avr-zigduino savetarget
$ make PERIOD=15 NODE=3 -j10
$ make udp-sender.avr-zigduino.u AVRDUDE_PORT=/dev/ttyUSB0
$ make udp-sink.avr-zigduino.u AVRDUDE_PORT=/dev/ttyUSB1
$ make login AVRDUDE_PORT=/dev/ttyUSB1
Running
If all is well, you'll see data being collected. The 5th entry on the line is the node # doing the sending, in this case it's '836' which is 0x0344, or node #3.
connecting to /dev/ttyUSB0 (57600) [OK] *******Booting Contiki-2.5-1364-g613783c******* MAC address 2:11:22:ff:fe:33:44:2 nullmac sicslowmac, channel 26 Routing Enabled Autostart other processes I am sink! IP addresses [4] fdfd::2 fe80::11:22ff:fe33:4402 UDP server started created a new RPL dag Server IPv6 addresses: :: aaaa::1 fdfd::2 fe80::11:22ff:fe33:4402 Created a server connection with remote address :: local/remote port 5688/8775 30 0 4 0 836 5 1 0 22 6666 0 0 0 0 0 580 8 512 1 65 2708 0 0 0 6738 0 0 0 0 0 30 0 41 0 836 1 1 0 22 2108 0 0 0 0 0 580 8 512 1 8 2708 0 0 0 6738 0 0 0 0 0 30 0 48 0 836 2 1 0 22 2954 0 0 0 0 0 580 8 512 1 16 2708 0 0 0 6738 0 0 0 0 0 30 0 58 0 836 3 1 0 22 4192 0 0 0 0 0 580 8 512 1 32 2708 0 0 0 6738 0 0 0 0 0 30 0 68 0 836 4 1 0 22 5410 0 0 0 0 0 580 8 512 1 32 2708 0 0 0 6738 0 0 0 0 0 30 0 78 0 836 5 1 0 22 6666 0 0 0 0 0 580 8 512 1 65 2708 0 0 0 6851 0 0 0 0 0 30 0 93 0 836 6 1 0 22 8563 0 0 0 0 0 580 8 512 1 65 2712 0 0 0 6851 0 0 0 0 0 30 0 95 0 836 7 1 0 22 8781 0 0 0 0 0 580 8 512 1 65 2708 0 0 0 6851 0 0 0 0 0 30 0 113 0 836 8 1 0 22 11034 0 0 0 0 0 580 8 512 1 131 2712 0 0 0 6738 0 0 0 0 0
Host PC: collect-view
Now you'll want to watch your data coming through, which is what the collect-view java app does for us. Note that I made a few modifications for Zigduino, so be sure to build a fresh copy. When running it, send in the device where the sink node is connected.
$ cd tools/collect-view
$ ant
$ cd dist
$ java -jar collect-view.jar /dev/ttyUSB1
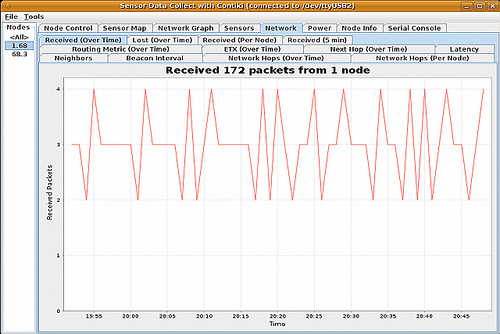
Launch the node info page, and you'll see stats on all of the nodes connected. The 'Received' counter should be steadily increasing for this one node that's connected.
Button
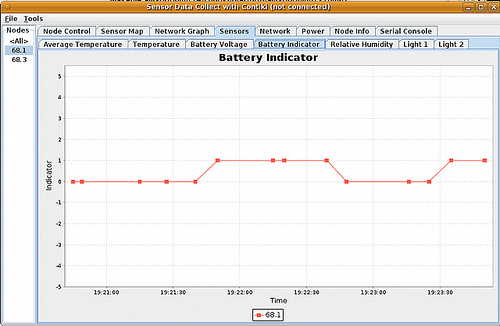
Contiki designates one button to be the 'button sensor', and hooks it up into the sensor framework. It just tells us whether the button is being pressed. The avr-zigduino platform expects a button connected to ground on Pin 7. This will show up as the 'button sensor'. The rpl-collect example for avr-zigduino puts the button sensor data on the 'battery indicator' page of the Collect View app.
Temperature
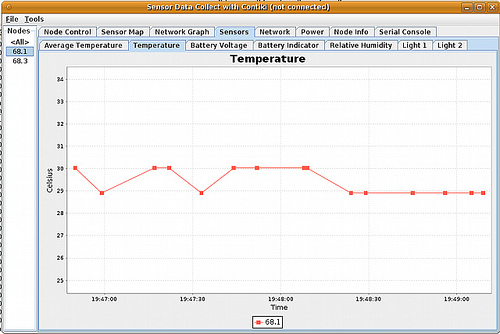
The Atmega128RFA1 has an internal temperature sensor, so the avr-zigduino platform exposes a temperature sensor to read it, and collect-view will pick it up accordingly.
Voltage
It's interesting to know how the battery is doing. While there is a “battery monitor” feature of the chip, it's not useful in the Zigduino case, because it only monitors the power coming into the chip. The Zigduino has a regulator, so there is always a steady 3.3V coming in.
What we do instead is hook up the battery voltage to analog pin A1, and read that. The chip uses an internal reference voltage of 1.6, so we first have to divide down the battery voltage into a measurable range. I am using a voltage divider circuit with a 1M and 470k resistors, so when the ADC pin reads 1.6V, there is actually 5.0V coming in through the battery. Here is a simple schematic to explain:
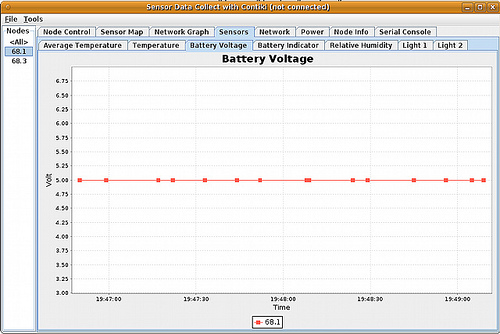
Here's what it looks like in collect-view. Not a lot of battery surprises in only a few short samples.
Sensor Message
We can dig into details about the message being transmitted to see what's going on under the covers. In tools/collect-view/src/se/sics/contiki/collect/SensorInfo.java, we can see the exact breakdown of the message expected by the Java app.
Sink Header
Values 0-7 are added by the sink after it receives the message from the sender, before it sends it up to the java app. DATA_LEN refers to the final length of the data which the sink is printing for the java app.
public static final int DATA_LEN = 0;
public static final int TIMESTAMP1 = 1;
public static final int TIMESTAMP2 = 2;
public static final int TIMESYNCTIMESTAMP = 3;
public static final int NODE_ID = 4;
public static final int SEQNO = 5;
public static final int HOPS = 6;
public static final int LATENCY = 7;
Sender Header
Values 8-19 are added by the sender to give information about the sender node and its position on the network. “DATA_LEN2” refers to the length of what the sender sent to the sink.
public static final int DATA_LEN2 = 8; public static final int CLOCK = 9; public static final int TIMESYNCHTIME = 10; public static final int TIME_CPU = 11; public static final int TIME_LPM = 12; public static final int TIME_TRANSMIT = 13; public static final int TIME_LISTEN = 14; public static final int BEST_NEIGHBOR = 15; public static final int BEST_NEIGHBOR_ETX = 16; public static final int RTMETRIC = 17; public static final int NUM_NEIGHBORS = 18; public static final int BEACON_INTERVAL = 19;
Sensor Message
Values 20-26 are the actual sensor values measured by the sensor modules and collected by the message builder.
public static final int BATTERY_VOLTAGE = 20; public static final int BATTERY_INDICATOR = 21; public static final int LIGHT1 = 22; public static final int LIGHT2 = 23; public static final int TEMPERATURE = 24; public static final int HUMIDITY = 25; public static final int RSSI = 26;
Interpretation
And some more clues on how to interpret these from SensorData.java
this.nodeTime = ((values[TIMESTAMP1] << 16) + values[TIMESTAMP2]) * 1000L; public static String mapNodeID(int nodeID) { return "" + (nodeID & 0xff) + '.' + ((nodeID >> 8) & 0xff); } public double getTemperature() { return -39.6 + 0.01 * values[TEMPERATURE]; } public double getBatteryVoltage() { return values[BATTERY_VOLTAGE] * 2 * 2.5 / 4096.0; } public double getRadioIntensity() { return values[RSSI]; } public double getLatency() { return values[LATENCY] / 32678.0; } public double getHumidity() { double v = -4.0 + 405.0 * values[HUMIDITY] / 10000.0; if(v > 100) { return 100; } return v; } public double getLight1() { return 10.0 * values[LIGHT1] / 7.0; } public double getLight2() { return 46.0 * values[LIGHT2] / 10.0; }


